September 27, 2012

Half-Assed Halloween: Easy Costumes for Your Half-Hearted Holiday

If you're anything like me, you simultaneously look forward to Halloween and are surprised at its sudden appearance. Every year, I think I will pull out the stops and do something crazy-wonderful costume (usually Ziggy Stardust is my aim). And every year, I say the weekend before Halloween, "I'm not going to have the time to put that together. What can I be?" So, dear readers, I've pulled together some emergency costume ideas for you.  

The Flapper


This is such an easy costume to create because, chances are, you already have everything you need for it.

What you need:

- Some kind of flappy or flowy dress, preferrably knee- or thigh-length; it doesn't have to be fitted or have the fringe, just something that will jump and twirl around.

 - Red lipstick; if you're feeling brave, try the traditional "cupid's bow" look (see Clara Bow for the best examples)

 - Fishnet or lace tights; because, I don't know, it's cute?

 - Eyeshadow; go for smoky and dramatic

 - Bobby pins; this is if you decide to do the finger waves that are synonymous with flappers. Here's my quick method for doing it:
1. Use way too much hair goop, slather it all over, especially at the front.
2. Take a section of your hair at the front and comb it straight down.
3. Hold the piece flat against your head and lay your index and middle fingers across it. Hold it tight.
4. With your other hand, slide the bobby pin toward the back of your head (between the two fingers), while not letting go of the hair. This will cause the bobby-pinned sectioned to be pushed back, while the parts you were holding down will stay in place, creating waves.
5. Blow-dry that motha. Then remove the bobby pins (or leave them in if you'll be partying hard).
This sounds strange, but it's the same general process that genuine flappers used, though they had neat gadgets to do the work for them.

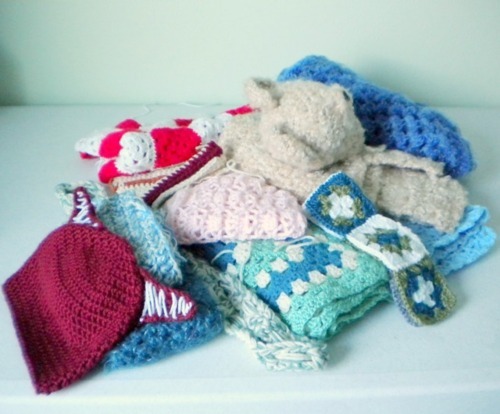
Or, if you don't really want to do that, you can just buy a flapper hat:


(Oh, what? You really thought I wouldn't use this opportunity to whore out my goods?)

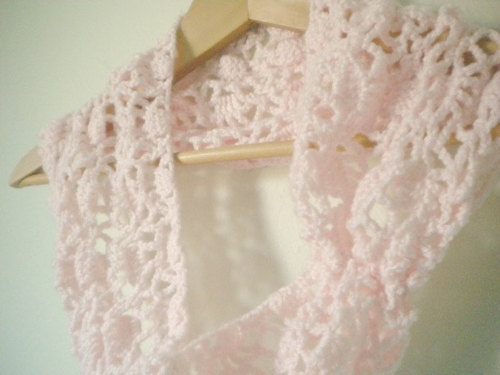
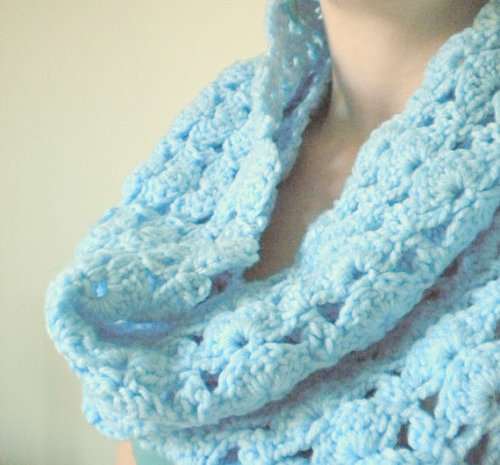
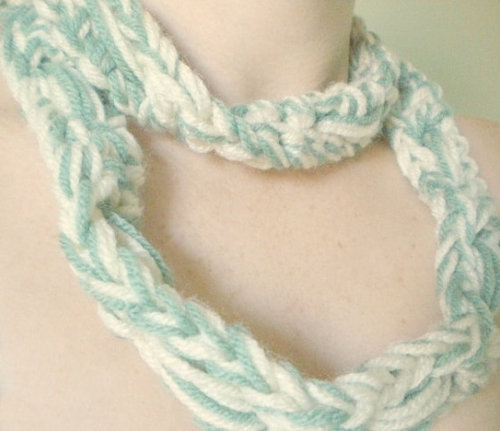
 - Heaps of necklaces; the longer the better, pearls and other "old-timey" necklaces are the best

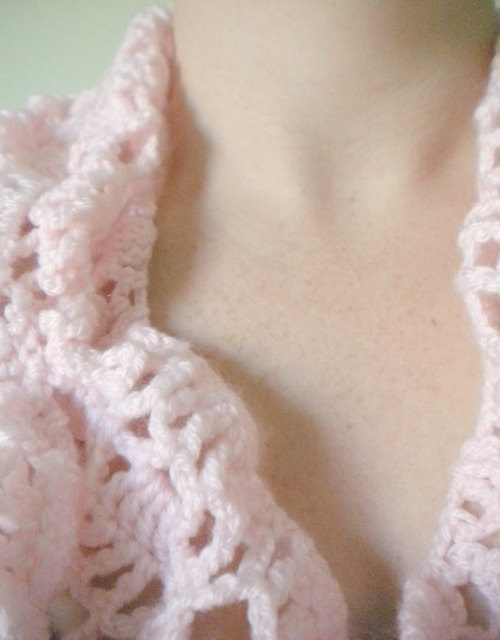
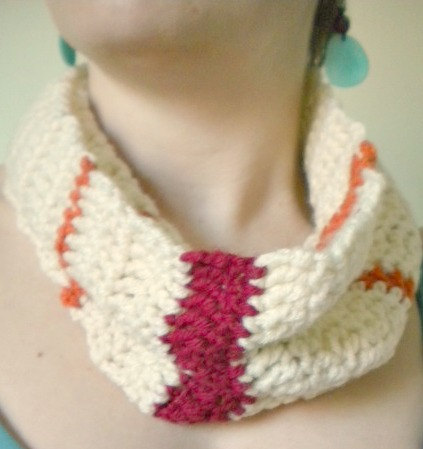
 - Add in some earrings, rings, and bangles for added measure:


 The beauty of the flapper costume is you can nail one aspect of it (the hair, the dress, the makeup, or the jewelry) and everyone will go, "Ah, yes, you are a flapper." Because frankly, our version of the flapper is so well-known, despite how historically inaccurate it may be. So have fun with it!

Read about the rest of the easy-peasy costumes by clicking here.

(I know you don't want to hear it, O Faithful Reader, but Blogger kind of blows so I'm sending you to Wordpress in order to read the rest. It's totally worth the journey.)

April 27, 2012

Handmade Banks (or, Why Everyone Needs a Woodworking Grandpa)

Everyone wishes they had a woodworker for a grandpa. Someone to build neat toys for you that you can pass on to your own children some day.

Well, guess what? I do have that grandpa! And this is no "sitting in a rocking chair on the porch, whittling away at a block of wood" grandpa. No, he has huge (and scary) machines, heaping wood piles, and some serious style.

Over the years, he's made a bunny-shaped coat hanger and various animal puzzles for Kayden. He made a book-thong holder for me. And a huge, sturdy rocking horse that I pretended was for Kayden, but it was actually for me too.

He also lets me shoot guns when I visit, but that's another post for another day:


So why am I bragging about my grandpa and waving around all the awesome things he makes for us? Because he is now selling some awesome stuff in the Hermits of Afton Etsy shop. Yes, you too can have a woodworking grandpa!

His first line of products is of the awesomely clever and fun wooden banks. Each one has a theme which is great for either men or women, while the craftsmanship and durability makes it great for kids too.

Get a bank and start saving up for...

...a new music instrument:


...a round of golf:


...escaping Arizona:


...just the hell of it. Because, face it, you are a responsible kid/adult who likes saving money, right?

(The irony of spending money to save money is not lost on me.)


Let me tell you a story about saving money: I don't really do it well. In fact, I forget that I have a savings account. This is normally a good thing, because it means you're not withdrawing from that account. But in my case, it means I'm not depositing anything into it either.

So how do I save money? I don't spend my change. At all. I just keep it in my pocket. Then each night, I drop all of my change into a bank. That's it.  And because I don't really want to pay for a skirt with dimes and nickels, I don't spend that money. As a result, it accumulates.  Last month, I dumped all that change into a coin counter at the bank. Guess how much a month of saving coins produced?

$175.

Seriously. After a month of dropping coins in a bank each night.

Of course, if you have no qualms about buying dinner with those dimes and nickels, there are handy ways of retrieving your money from these banks:


Start reaping the benefits of a woodworking grandpa today!

April 18, 2012

Finish Unfinished Projects Week

I'm a hat-maker 90% of the time. Sometimes I'll throw in a custom-ordered book thong or a custom-ordered baby blanket or a custom-ordered scarf. But it's not often I set out to make any of these items for the hell of it. The reason why is that I love hats and wear them all the time.

The real reason, though, is that it takes me about 2-4 hours to make a hat (depending on the complexity). And after I make a hat, I can spend time adding artistic touches to it. I like being able to kick out a "base" quickly, then do the interesting work to make it a special Bitter o'Clock hat.

What I can't do is work on the same stitch over and over again, with no end in sight. And with nobody ordering that product (and therefore, no deadline and no tangible motive for doing it), I lose interest.

With all that being said, I was setting up my designated craft area last week when I came across my Unfinished Projects drawers. A big pile of sad, half-finished (or half-unfinished, depending on your perspective) projects just filling up precious space.

(And sadly, this is not even all of the projects...)

With the weather getting warmer and fewer people thinking wearing a skein of yarn on their heads in 70+ degree weather is a good idea, the business was slowing down. I decided it was time to work through some of those projects.

First up was that pink lacy thing you see up there. It was supposed to be a jacket, I think? Maybe a shirt? I have no idea. What I do know is that I had no intention of seeing it through. And so, in the grand tradition of "Bitter o'Clock turns unfinished shit into neckwarmers," I turned it into a neckwarmer (or rather, a cowl, which is pretty much a baggy neckwarmer):

Crochet Infinity Cowl- Mesh Pattern in Powder Pink

Next up, the blue thing.

Now, I remember where I was going with this. I was going to be a baby blanket for a pregnant coworker. Well, I believe that baby is now five years old and I haven't been at that job for four of those years.

And so, it becomes a neckwarmer:

Crochet Infinity Cowl- Mesh Shell Pattern in Summer Sky Blue

Now, lest you think I'm all about the lazy style of crocheting, here are some projects that were actually begun with the intention of being neck accessories. Granted, I intended them to be scarves, but whatevs...Neckwarmers!

Crochet Scarf Necklace in Celery Green and Cream

Crochet Infinity Cowl- Buttercream Scarf with Stripes of Dark Red and Orange

Crochet Flower Neckwarmer with Gold Button- Scarflette in Purple and Olive Green

By the week's end, I had finished five of the projects. Watch out for more upcoming finished projects (oh, let's just call it like it is, they'll probably be neckwarmers) next week!

March 30, 2012

Smoke and Mirrors by Bitter Sweet Blog

Remember my post about creating an illusion? Here is another article about creating illusions in photography, found on Bitter Sweet Blog. Her solution to creating steam is hilarious.

Click here to go right to the article.

March 19, 2012

How to WIN on Etsy: Create an Illusion and a Theme

This is part of a series in which I gave half-assed advice on product photography. Part one was about brightening your photos, while part two was about getting rid of the background clutter.

Before I jump into talking about photos, I have an announcement to make. My dear grandma has caught Etsy fever. As you may remember, she is the one who taught me how to crochet back in 2005. Well, now you can check out her own mad skillz at Hermits of Afton! However, because she has no interest in the marketing and selling side of the craft business, her shop is being run by yours truly. Because of this, I get to have more fun with the product photography (not that shooting hat after hat after hat isn't thrilling...but it is nice to work with other types of products). And that is what has inspired today's post.

In the post about background clutter, I mentioned how you should "control your environment". Basically, make sure whatever is in the photo is intentional and remove anything that doesn't belong. Creating an illusion is similar in that you are controlling the shot, but in this case, you are also showing a product in action. Is that vague enough for you? Here are some examples--using
products by Hermits of Afton, of course.

This pair of adorable monkey slippers should sell themselves, all by themselves, right?


Sure, a detail shot of the product is really nice. But a second shot showing how the product can be used would be even better, don't you think? Hats being worn on heads and not just laying on the floor. Pictures hung on the wall, instead of laying on the floor. A blanket wrapped around someone, rather than laying on the floor. Okay, you got me: anything is better than just laying your product on the floor.

So, we have a pair of baby booties and should theoretically show a baby wearing it. One problem, though: I have no baby and I have no access to a baby.

Enter the illusion.


I don't have a baby, but what I do have is a little girl with skinny arms:


Now scroll back up to those earlier pictures and try to un-see that the legs are actually arms. That, my friend, is il-lus-ion.

Here's another example that also incorporates the idea of "hide the (unintentional) clutter".

For the line of dish soap covers, I wanted to create a scene of tranquility. A scene that says, "By buying these prairie dress washcloths, your kitchen will be transformed into a magical place where doing the dishes downright rocks."


The only thing in the background is a blurred plant and a sunlit window, both intentionally included in the shot. But you know what isn't included in the Etsy pictures?


All the dirty dishes I had to move to get a clean (no pun intended) shot, not to mention all of our counter debris. By purposely excluding that from the shot, I made sure the customer's focus would only be on the product and how they could use it in their own home.

(By the way, if you look closely, you may even see the dividing line of where I cleaned the sink and counter.)

Here's the last example, which incorporates intentional clutter, creating an illusion, and maintaining a theme.

For the line of sewing products, I wanted to create a theme which was, "Look how bright and beautiful and clean your sewing workspace can be! To get this space, all you need to do is buy this scissors case!"


Now, when I said "intentional clutter," you didn't really expect clutter, did you? A couple needles, a button, a sewing machine, strewn haphazardly as if a seamstress were caught by surprise while hard at work. Hard at work in her very bright and very clean workspace.

Again, illusion. I don't actually know anybody whose workspace is that neat. Here's mine when I'm sewing:


However, does anything in that photo appeal to the buyer in you? Probably not. And that's why we create an illusion.


Here are some wonderful examples of creating illusions and establishing themes on Etsy:


Gray Donkey Toy Rattle by MiracleFromThreads

Forget the baby! With such a whimsical layout, wouldn't you want to play with this?!


Vintage Monogram Passport Wedding Invitation by BeyondDesign

Since this wedding invitation is both travel- and vintage-themed, the seller maintained the theme by incorporating vintage travel items.

So, if you're confused about how to create a theme, answer these questions:

  • Who (or what) will use the product? A baby? An overworked mother? A dog?
  • How do they (it) use it?
  • How should they feel while using it? Pensive? Tranquil? Excited?
  • Can you photograph it being used?
  • Better yet, is there a way to create the illusion of it being used, while controlling your environment?
  • Finally, how can you tie all of these ideas into one beautiful picture?

And lastly, here are some ideas for creating an illusion:

  • Have a beach-themed item, but no beach within 500 miles? Find a sandy volleyball court or playground.
  • Have an item that is designed to be used on animals...but you're allergic? Find a realistic-looking stuffed animal to use (but for the love of Rob Kalin, make sure the viewer can't tell it's a stuffed animal...stay tuned for that upcoming article)
  • Have an item to be used at a wedding? Buy a $30 dress from a thrift store and stage a mock wedding, using close-up shots. Better yet, you may even have a friend who would love to relive her wedding by posing in her dress.

February 7, 2012

Upgrades, Repairs, and Other Joys of Home-Owning

Back in July, when we were so young and fresh-faced, Keene and I walked through what would become our home. We oohed and ahhed and peeked in rooms. We mentally redecorated the living room and pictured the children playing in the backyard. We immediately began the process of buying the house.

But you know what we should have done? We should have been pulling the previous owners' clothes out of the closet. We should have knocked all of their dishes out of the cupboards. We should have pushed their toolboxes off of the workbenches in the garage. Because you know what we found once the house was empty and ready for us to move in? A whole lot of particle board.

Bowed particle board in the closets. Sticky particle board in the pantry. Waterlogged particle board in the garage. There was more particle board in the house than in all of Home Depot.

So, I've had some people ask for pictures of our various upgrades and repairs. (Yes, really! This isn't a situation where I just want to talk about something, so I say, "People have been asking me ________." No, people really have been asking me. Seriously, I can prove it.) So here are our latest projects.

Pantry

This was the very first thing we blew money on fixed up. Now, this is actually a picture of our closet, but the shelves are similar to those in the pantry. Meaning, exposed particle board, haphazardly installed, and awfully inefficient where space is concerned.


Keene started by ripping out all of the shelves. Turns out, the walls behind the shelves were just as gross:


We repainted the walls and Keene installed wire racks instead:


And then he installed a broom/mop/child-holder on the back of the door:


Now, ten points if you can spot our next repair in this picture.


Think you've got it?

Yup, the door itself. Notice how it awesomely opens so that it effectively blocks you from the rest of the kitchen? We have found that that area is like a little Bermuda Triangle: In the span of four feet, you have a bathroom door, pantry door, two spice cabinets, the fridge, and the dishwasher all vying for the same opening space. At least once a week, somebody finds him or herself trapped in this mess of doors. While it may not solve the mystery of the Bermuda Triangle, replacing the pantry door (so it swings in the other direction) will be a quick and easy fix.

Before:

After:

Here is a dramatic reenactment:


Garbage Disposal

Moving along, we also installed a garbage disposal. I wish I had pictures of the before/after and installation process. But that would have been very boring, so I didn't do it. Instead, here's the after:


Spider Tree

There is a large fir tree in our front yard. It was so close to the house, it literally pressed on it. An inspector told us that it would eventually have to be chopped down, as it would wreck havoc on the house. We decided to just trim the branches which were touching the house--rather than chopping the whole thing right away.

So we started with this:


And we started chopping branches.


And then we discovered something horrific: old pine needles literally two feet deep below the branches. Which emitted strange, green fumes and set forth hundreds of wolf spiders when we tried raking them.

Blehuhuhchu. That's the sound I made. Over the course of a weekend, we alternated chopping branches with exorcising the pine needles using a snow shovel and garbage bags.


Once the trunk was naked from seven feet down, we called it quits.

Landfill cleanup

One thing we did notice during the initial walkthrough was this:


A large pile of junk, garbage, and rotting wood. "No worries," we thought. "That'll be gone before we move in! Yay!"

But guess what was waiting for us once we moved in.


Another weekend of hauling garbage to the curb and further testing our garbageman's boundaries.

Kayden's New Room

Finally, a fun project! Kayden got his loft bed about four years ago:


For those not in the know, a loft bed is basically a bunk bed, except instead of a bed on the bottom, it's just open space. Or you could think of it as a bed on stilts.

Anyhow, the loft bed was fun and novel when Kayden was a little boy of eight. But now he's a strapping young man of eleven and the loft bed has lost its appeal. Every night, climbing up and down a ladder has started to wear on him. Moreover, his new room has a lot less space than his room at the old apartment, so we were facing a serious organizational dilemma.

So I came up with a brilliant idea.

We took out the mattress from the loft and measured the area:


Then we had a piece of heavy plywood fitted (albeit very tightly fitted) to the area:


Keene bolted the plywood to the metal bars, using carriage screws, nuts, and these weird metal things:


Then we lay down a rug which appeared to be made from the fur of a Muppet.


Maia did the honors of smell-testing the new carpet:


Keene built a wall-hung bookshelf, which was promptly filled to bursting:


When times got hard and our motivation wanned, Kayden pushed us to keep going:


And gave his approval of his new reading- and play-nook:


Lastly, we moved Kayden's mattress (temporarily on the floor) to underneath the loft and his desk against the wall. I wish I had taken a before picture to show what a huge change this was and how much space it created for him. Next time, next time.